
Getting Started with SQLMesh: A Comprehensive Starter Guide
A tutorial getting you started in sqlmesh

I assume you know what SQLMesh is and why you might consider using it. If not, I suggest you read this other article first.
In this article, I’ll guide you through a small project or tutorial to help you get started with SQLMesh. You can choose to follow along step-by-step or read through to gain an understanding of the process. You can check out my GitHub repo which contains the final state of the project.
SQLMesh provides a nice UI in which you can develop your models, but I’ll mainly use the CLI in this tutorial. You can work on a SQLMesh project with the CLI, the Notebook interface, or the UI.
SQLMesh has several tutorials on getting you started as well. You might want to check out their website.
Setting Up The Environment
You can use your preferred IDE, but I’ll use VSCode for this tutorial. We’ll utilize duckdb as both the execution engine and the data source. Check out this other article if you’re interested in getting started with duckdb with the CLI and Python.
First things first, let’s set up the working environment by installing Python and the necessary dependencies.
Create a Python virtual environment and install dependencies:
python -m venv .venv
source ./venv/bin/activate
pip install 'sqlmesh[duckdb]'
We’ll use a simple dataset to focus on understanding SQLMesh.
Let’s create a source db in duckdb CLI (you can do the same in Python). I’ll be using the name “db.db” since it’s the default name that SQLMesh configures when initializing a duckdb project:
duckdb db.dbCreate the source table:
CREATE SCHEMA example;CREATE OR REPLACE TABLE example.letters (id INTEGER, letter CHAR(1), value INTEGER, updated_date DATE); Insert data:
INSERT INTO example.letters VALUES (1, 'A', 10, '2025-01-07'), (2, 'B', 20, '2025-01-07'), (3, 'C', 30, '2025-01-07');Let’s check the table we just created:
SELECT * FROM example.letters;

┌───────┬─────────┬───────┬──────────────┐
│  id   │ letter  │ value │ updated_date │
│ int32 │ varchar │ int32 │     date     │
├───────┼─────────┼───────┼──────────────┤
│     1 │ A       │    10 │ 2025-01-07   │
│     2 │ B       │    20 │ 2025-01-07   │
│     3 │ C       │    30 │ 2025-01-07   │
└───────┴─────────┴───────┴──────────────┘
Initializing Your SQLMesh Project
In the command line, run the following to initialize a sqlmesh project:
sqlmesh init duckdbOnce you run that command, you’ll see several folders generated just like when you initialize a dbt project:
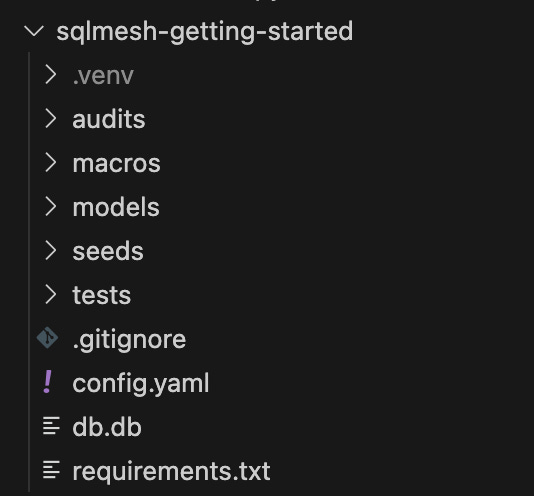
First Look at the SQLMesh Project: Navigating the Project Structure
In the screenshot above, you see multiple folders such as:
“audits” - SQL files to define your custom data audits
“logs” (you’ll see this once you run the project) - log files
“macros” - Python files for Python macros and SQL files for Jinja macros
“models” - SQL or Python files/models will be stored
“seeds” - static CSV files
“tests” - yaml file(s) defining your unit tests
You also see the “config.yaml” file where you configure your SQLMesh project settings.
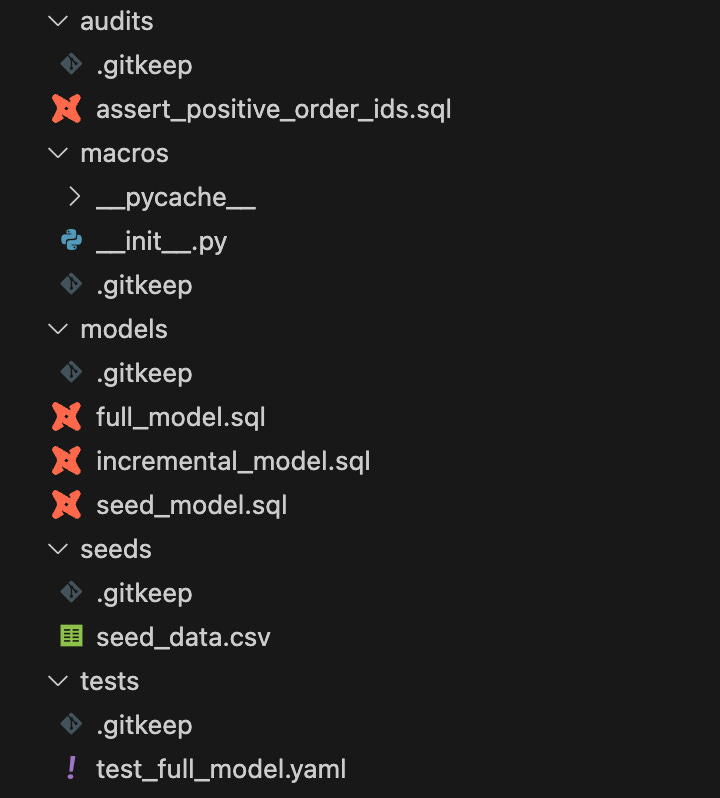
When you open up each folder, you’ll see some files (I have the dbt VSCode extension installed, which is why SQL files have a dbt icon):
Let’s take a look inside the “config.yaml” file.
gateways:
  local:
    connection:
      type: duckdb
      database: db.db

default_gateway: local

model_defaults:
  dialect: duckdb
  start: 2025-01-09
This is where you configure your connections to your databases. SQLMesh initializes what’s above for a project with duckdb as its backend. It’s basically saying that SQLMesh uses a gateway called “local” by default, with duckdb as its execution engine in a database named “db.db” with duckdb SQL dialect. As you might’ve guessed, you can separate the test connection and state database connection in this config file.
For now, let’s modify this config file a bit, adding a separate test/state connection:
gateways:
  local:
    connection:
      type: duckdb
      database: db.db
    test_connection:
      type: duckdb
      database: test.db
    state_connection:
      type: duckdb
      database: state.db

default_gateway: local

model_defaults:
  dialect: duckdb
  start: 2025-01-07
I specified the use of “test.db” for running tests and “state.db” for managing state information.
A note: you can also add multiple gateways, perhaps one called “prod” or “dev”. However, separating environments this way won’t utilize the concept of virtual data environments. Multiple gateways should only be used when developer don’t have access to production data or put in another way, you have to have different data between development and production. If that’s the case, you want to have separate gateways, each with its own state connection. You can read more on this in the SQLMesh documentation page.
Now that we have an overall structure, let’s go through building models, macros, audits, and tests for a toy project.
Building Your Models From Scratch
We’ll build models, Python macros, audits, and tests.
In the initialized SQLMesh project, there are 3 models:
seed_model.sql
incremental_model.sql
full_model.sql
Seed models are kind of static, and to make our project a bit more meaningful, we’ll be completely replacing the seed model with the one using some data we just generated in a prior step. We’ll also replace the other 2 models with new ones.
After that, we’ll execute models and create a simple Python macro, a custom audit, and a unit test. We’ll see how all of this works together nicely.
Let’s remove the “seed_model.sql” file from the project. You can either do it manually or run a command:
rm models/*.sqlLet’s create a new model that’ll be the base for the other 2 models. We already have created a source table in “db.db”, which is set as the connection database for the SQLMesh project.
Building a Base Model
I’ll name this model “base_model.sql”:
MODEL (
    name example.base_model,
    owner Yuki,
    kind VIEW,
    cron '@daily',
    grain id,
    column_descriptions (
        id = 'primary key',
        letter = 'alphabet letter',
        value = 'random value'
    )
  );

  SELECT
    id::INT,
    letter::TEXT,
    value::INT
  FROM
    db.example.letters  -- full table path
Some things to note:
Model metadata goes in directly in the model file, instead of defining everything in a separate yaml file as you do in dbt.
You may not be familiar with metadata like `
kind`, `owner`, `cron`, and `grain`, but they are pretty self-explanatory. Though `cron` will be used when running `sqlmesh run` which we’ll cover later. You can check out available model properties on SQLMesh’s documentation page.Type casting is done using the Postgres `
x::int` syntax. You can also specify the schema (column name = data type) in the `MODEL` block instead.You can add column descriptions by adding a comment like this `
id::INT — primary key`, but I like putting column descriptions in the `MODEL` block.If you’re referring to a table outside of SQLMesh’s project, it’ll be treated as an external table and you’ll need to specify the table path, instead of a model name.
External Models
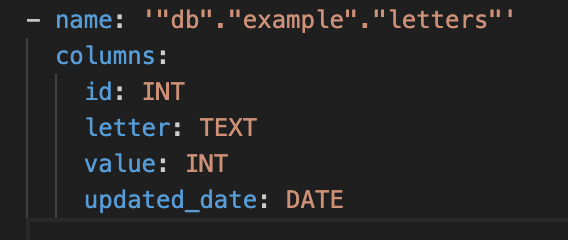
Optionally, you can create/generate an `external_models.yaml` file to store the external table’s metadata. The benefit of defining the metadata of external models is that SQLMesh can make features more useful. For instance, if you don’t have the yaml file created, you won’t get the column-level lineage to external models.
To create `external_models.yaml` file, you can either define the yaml manually or run the following command:
sqlmesh create_external_models SQLMesh will create a yaml file that looks like this:
Building Downstream Models
Now that the base model is ready with its external model schema info in place, let’s create a few more models.
“example.intermediate_model.sql” - This model is similar to “base_model.sql” except it includes a new column, changes how it only needs to specify the model name of the upstream table, and uses the `
FULL` materialization strategy:
MODEL (
    name example.intermediate_model,
    owner Yuki,
    kind FULL,
    cron '@daily',
    grain id,
    column_descriptions (
        id = 'primary key',
        letter = 'alphabet letter',
        value = 'random value',
        updated_date = 'updated date',
        new_col = 'a new column'
    )
  );

  SELECT
    id,
    letter,
    value,
    updated_date,
    'new_col' AS new_col
  FROM
    example.base_model
“example.incremental_model.sql” - This model uses the `
INCREMENTAL_BY_TIME_RANGE` materialization strategy, which is one of the 3 incremental load options in SQLMesh. This requires you to add a where clause making sure only necessary data will be processed.
MODEL (
    name example.incremental_model,
    owner Yuki,
    kind INCREMENTAL_BY_TIME_RANGE (
        time_column (updated_date, '%Y-%m-%d'),
        lookback 5,  -- to handle late arriving date
    ),
    start '2025-01-01',
    cron '@daily',
    grain id,
    column_descriptions (
        id = 'primary key',
        letter = 'alphabet letter',
        updated_date = 'updated date',
    )
  );

  SELECT
    id,
    letter,
    updated_date
  FROM
    example.base_model
  WHERE
    updated_date BETWEEN @start_date AND @end_date
I won’t go too deep into SQLMesh’s incremental load options, but simply put, you can load data incrementally using:
by time range
by partition
by unique key (a merge operation)
A tip: if you want to use the file name as the model name like you usually do in dbt, you can set add configuration in config.yaml like this (learn more in this documentation page):
model_naming:
  infer_names: true
Apply Changes With “sqlmesh plan“
Now that built out our models, we’ll review changes and load data with the `sqlmesh plan` command.
Note: the `
test_full_model.yaml` file that came with the project when we initialized it, should be deleted since it’s no longer applicable to our project. If you try to run the command below without the yaml file deleted, you may encounter an error. So, make sure to remove it from the project before proceeding.
Go ahead and run:
sqlmesh plan devYou’ll be asked the date range for how much you want to backfill the data but keep them blank by hitting the return key. For the last question, enter `y` to apply the changes:
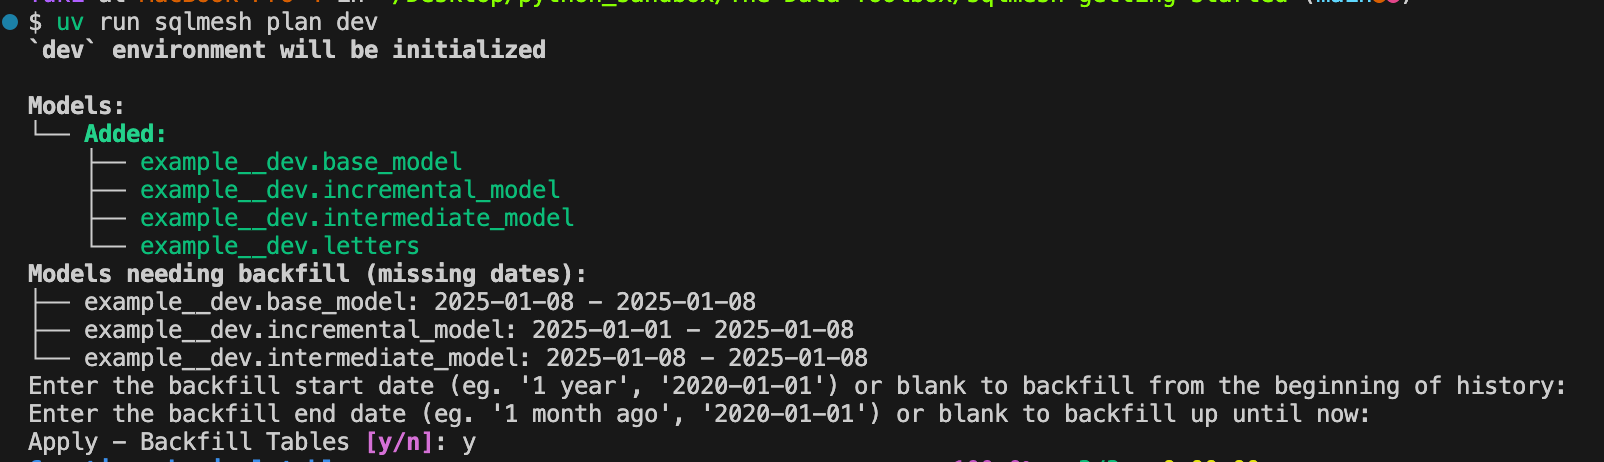
After that, you’ll see this:
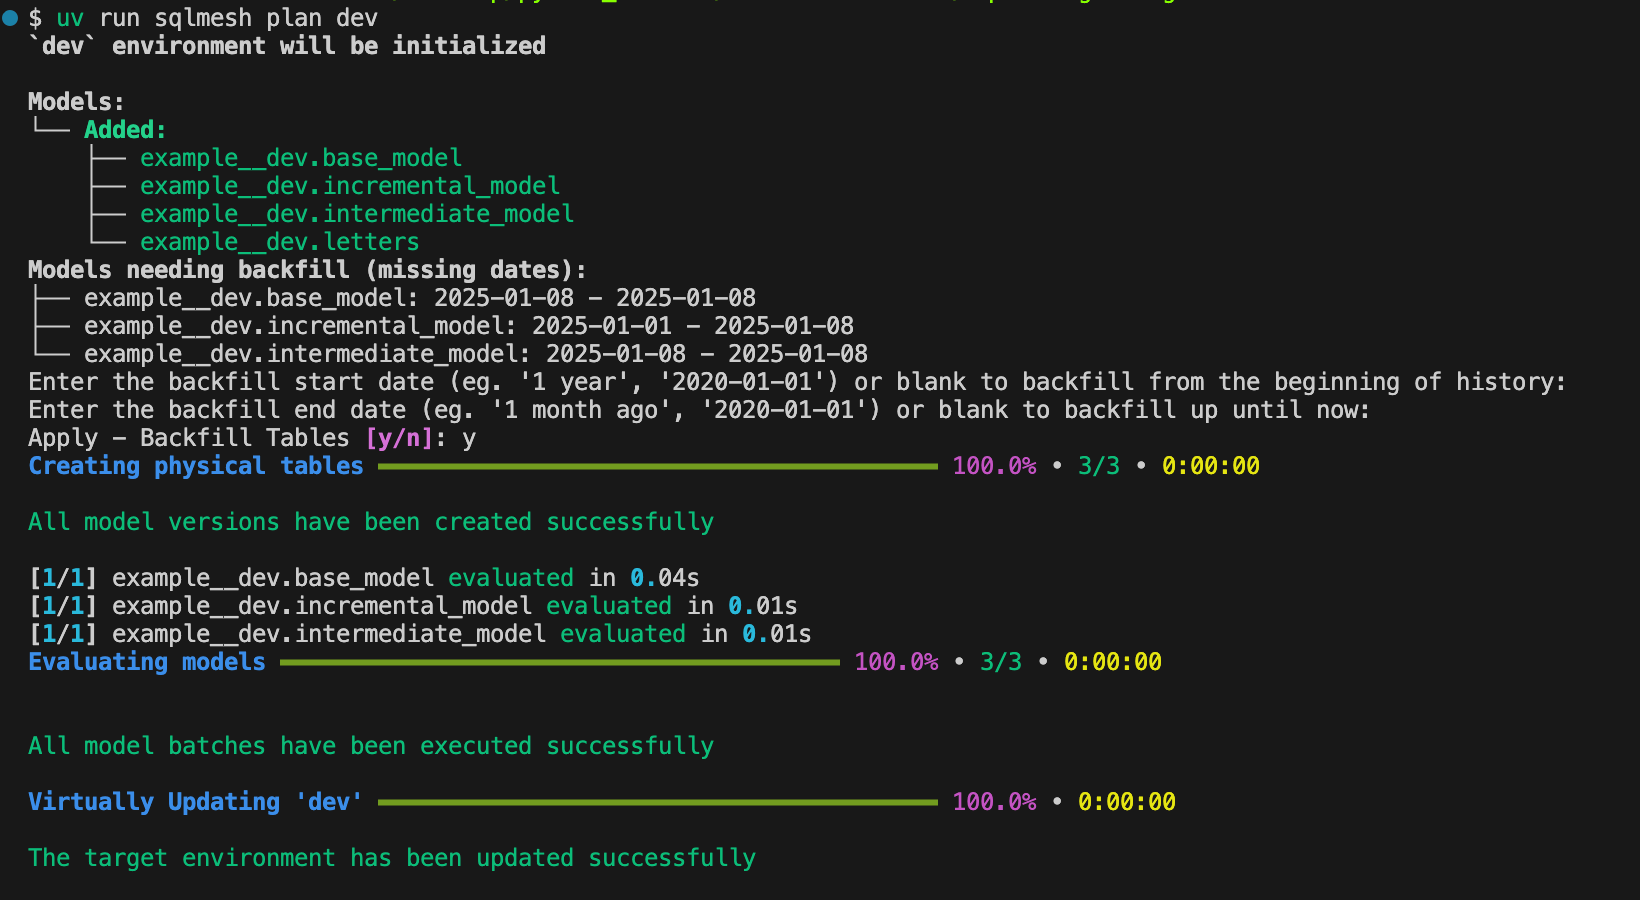
To make sure your models are materialized, you can either go into your database or use the `sqlmesh fetchdf` command:
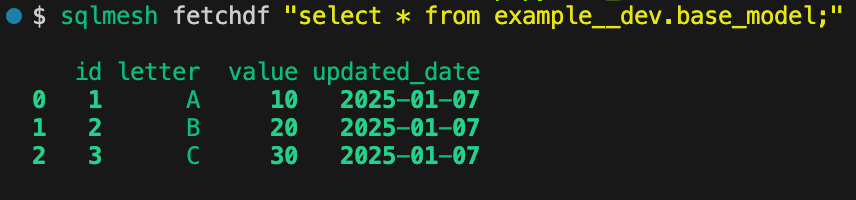
Notice that I had to specify the schema as `example__dev`. Your schema is in this format, `YOURSCHEMA__{YOURENVIRONMENT}`. In this case, I ran `sqlmesh plan dev`, and the suffix of `__dev` was added.
If everything looks good then you can deploy the changes to production by running:
sqlmesh plan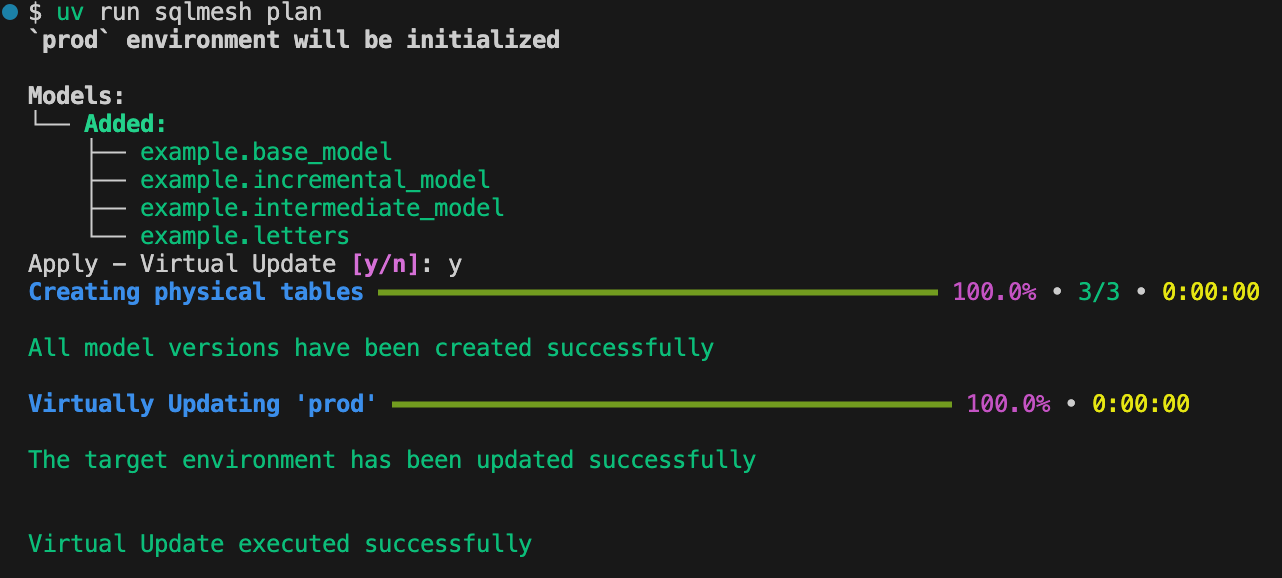
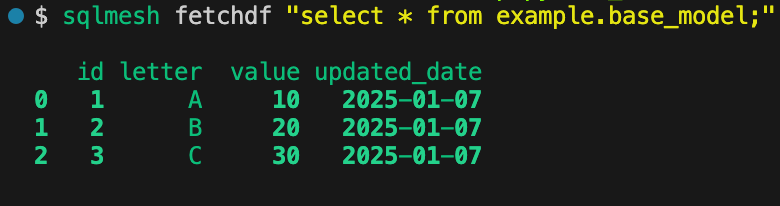
Check the base_model table in production (no suffix to the schema):
You might’ve noticed that when we ran `sqlmesh plan`, we didn’t need to backfill any data. SQLMesh just switched the pointers to the updated tables through the use of views.
Now, in a real project, running `sqlmesh plan dev` and `sqlmesh plan` sequentially may not be the way you deploy to production. The good news is that SQLMesh has an open-source GitHub Actions CI/CD Bot. It does things like:
Automatically run unit tests on PRs
Automatically create PR environments that represent the code changes in the PR
Automatically categorize and backfill data for models that have changed
Automatically deploy changes to production with automatic data gap prevention and merge the PR
(these bullet points are copy-and-paste from the SQLMesh website)
I won’t go into this in this article but in another article in the future.
What About “sqlmesh run”?
When I was first getting started with SQLMesh, I had a question - what’s the difference between `sqlmesh plan` and `sqlmesh run`?
`
sqlmesh plan` summarizes the local changes and lets you review and execute your models in the target environment.`
sqlmesh run` execute models according to each cron schedule. To me, it’s easier to think that it’s `dbt run` except that SQLMesh utilizes the `cron` defined in the model property. For instance, let’s say you have a model with a daily cron schedule and another model with an hourly cron schedule. You schedule to run the `sqlmesh run` command every hour via something like GitHub Actions. Your model with a daily cron schedule only runs once a day, whereas if you’re running `dbt run` hourly then all the models run every hour, leading to wasted compute resources.
Now that we covered 2 crucial SQLMesh commands, let’s continue working on our tutorial/project.
Macros
There are 2 ways to create macros in SQLMesh. One way is using Python and another way is using Jinja. We’ll ditch Jinja and create a Python macro.
Let’s build a simple Python macro. Create a Python file called “custom_calc.py” under the macro folder and add the following code:
from sqlmesh import macro

@macro()
def multiply_by_10(evaluator, col):
    return col * 10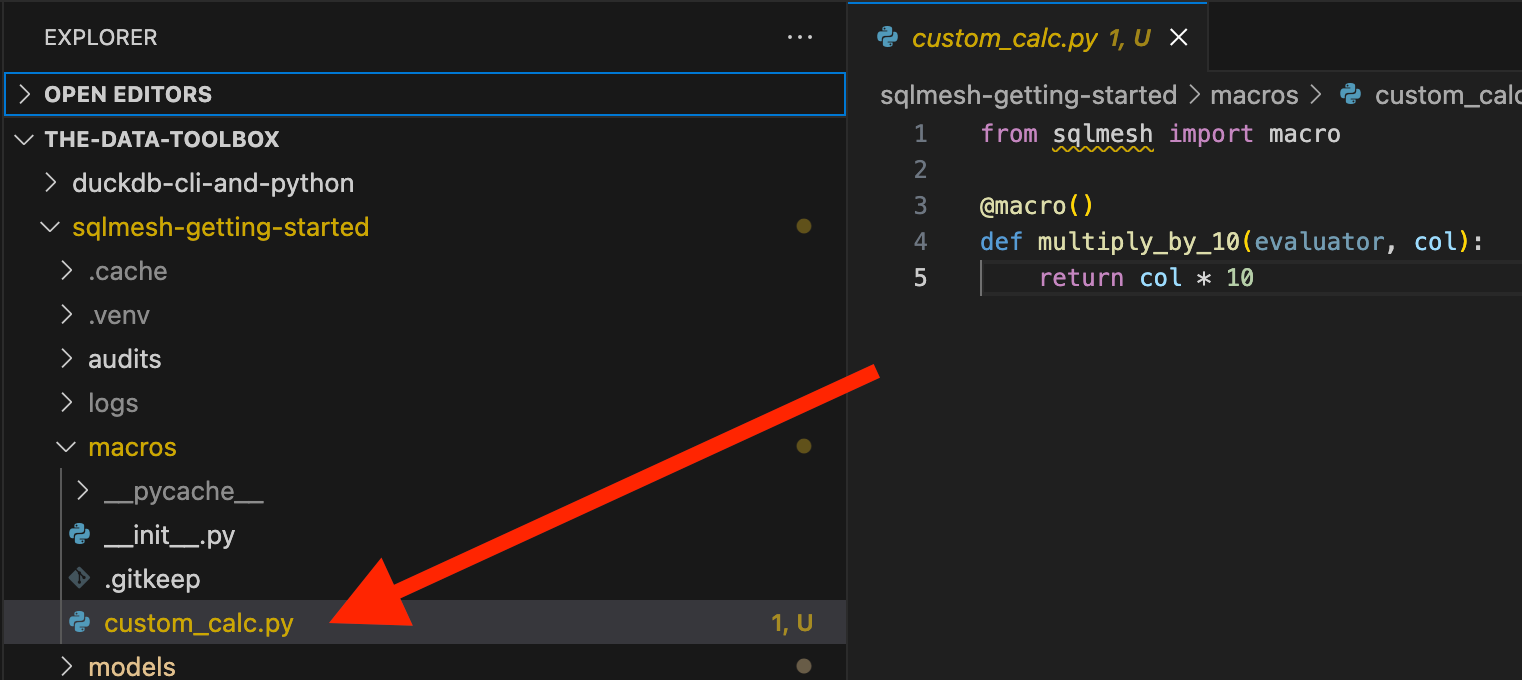
Note that You’ll have to add the @macro decorator for SQLMesh to recognize it as a macro and be used in your models. You also need to add `evaluator `one of its function arguments.
Let’s add this macro to the “example.intermediate.sql” model:
MODEL (
    name example.intermediate_model,
    owner Yuki,
    kind FULL,
    cron '@daily',
    grain id,
    column_descriptions (
        id = 'primary key',
        letter = 'alphabet letter',
        value = 'random value',
        updated_date = 'updated date',
        new_col = 'a new column'
    )
  );

  SELECT
    id,
    letter,
    value,
    @multiply_by_10(value) AS big_value,
    updated_date,
    'new_col' AS new_col
  FROM
    example.base_model
We added @multiply_by_10(value) AS big_value in the model. The `@` symbol is used to reference your macro in a SQL model.
Creating a Python macro and adding it to a model is as simple as what you just saw.
With Python macros, you’re not limited to what SQL can do. You can build any logic for your data transformations.
A tip: In a macro Python file, you can create other functions without the `
@macro` decorator and `evaluator` argument. You can use these functions to help with and organize the code and the logic in your macro function(s).
Audits
SQLMesh audits are basically dbt tests. There are built-in audits in SQLMesh such as `unique` and `not_null`. You can also create your own custom audits.
Creating a Custom Audit
You should already have an SQL file that contains a custom audit under the audits folder.
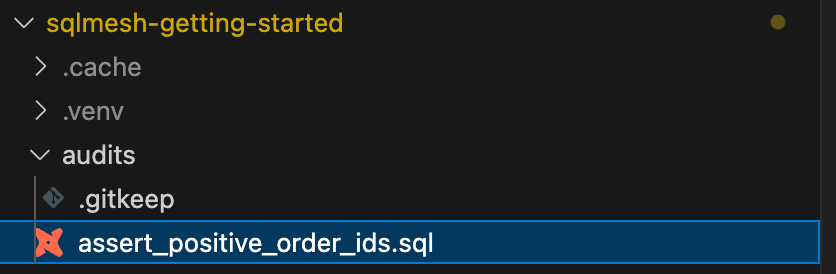
We’ll modify this one to fit our use case:
Rename “assert_positive_order_ids.sql” to “assert_positive_ids.sql”
Replace the code with the following:
AUDIT (
    name assert_positive_ids,
  );

  SELECT *
  FROM @this_model
  WHERE
    id < 0
This is to check the `id` column only contains positive numbers.
Adding a Custom Audit To a Model
Next, we’ll add this custom audit as well as a few other built-in audits to the “base_model.sql”:
Add these lines to the MODEL block:
audits (
      assert_positive_ids,
      unique_values(columns = id),
      not_null(columns = id)
    )
The whole code looks like this:
MODEL (
    name example.base_model,
    owner Yuki,
    kind VIEW,
    cron '@daily',
    grain id,
    column_descriptions (
        id = 'primary key',
        letter = 'alphabet letter',
        value = 'random value',
        updated_date = 'updated date'
    ),
    audits (
      assert_positive_ids,
      unique_values(columns = id),
      not_null(columns = id)
    )
  );

  SELECT
    id::INT,
    letter::TEXT,
    value::INT,
    updated_date::DATE,
  FROM
    example.letters
Running Audits
SQLMesh automatically runs audits with the `sqlmesh plan` command (after the execution of the models).
You can also run this command to only run audits (you may need to apply a plan before running this command though):
sqlmesh audits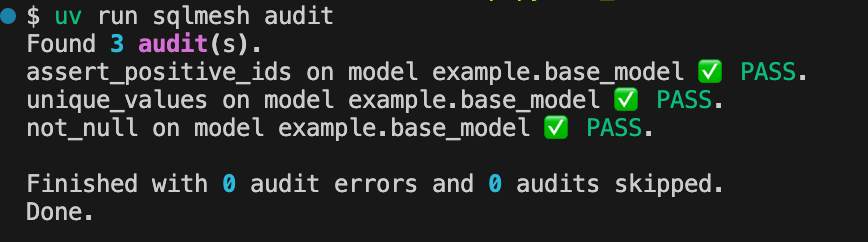
One good thing about audits in SQLMesh is that by default, if an audit fails, SQLMesh stops the execution of the pipeline to prevent incorrect data from going further.
Tests
SQLMesh tests are to test the code as opposed to testing the data. We just need to supply the input and expected output for tests in yaml files.
Creating Tests
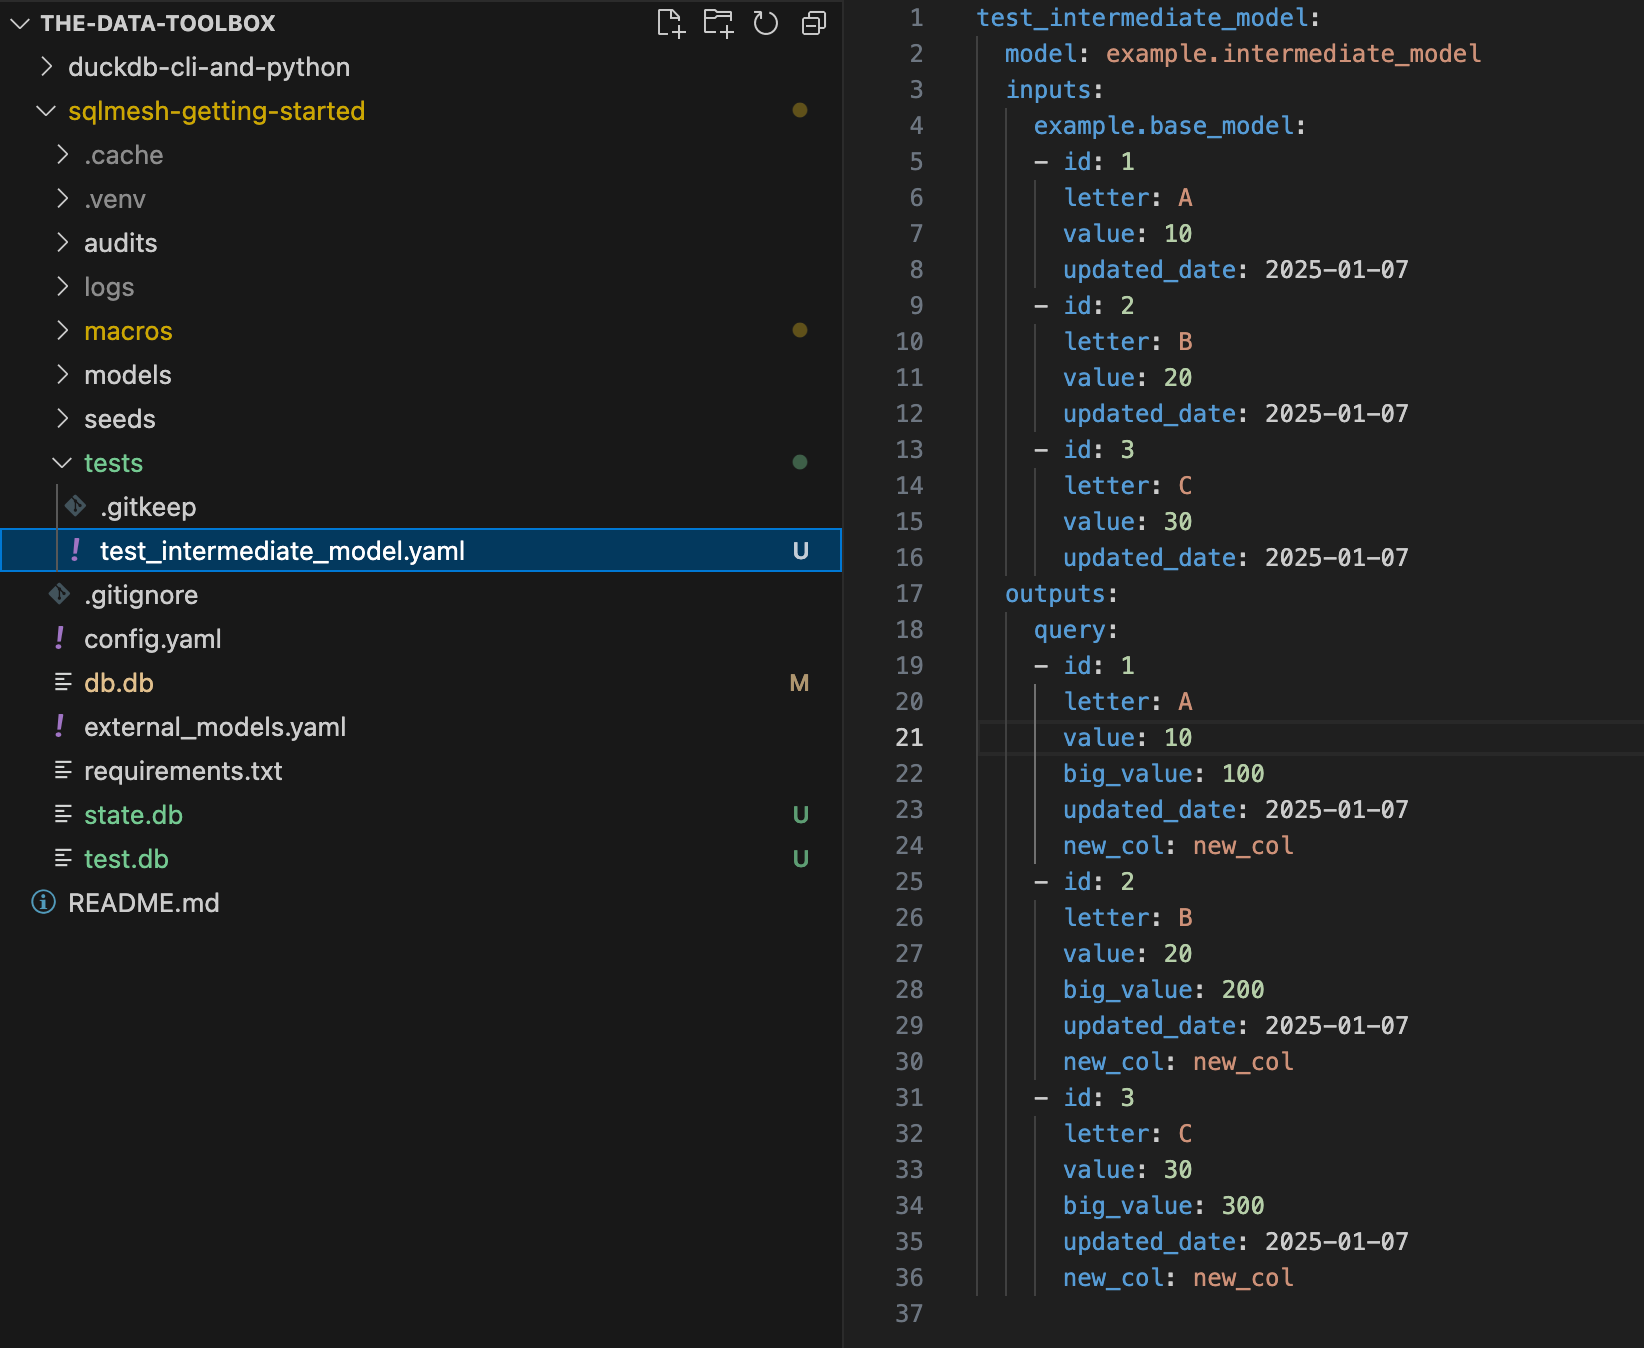
SQLMesh makes this process easy with the `sqlmesh create_test` command. Go ahead and run the following, specifying the model you want to create a test for, its upstream model, and an example query.
sqlmesh create_test example.intermediate_model --query example.base_model "SELECT * FROM example.base_model WHERE updated_date BETWEEN '2025-01-01' and '2025-01-15'" Here’s the test the above command generated for me:
You can provide this manually as well.
Running Tests
The `sqlmesh plan` command runs tests (before the execution of the models) as well as the `sqlmesh test` command.
Let’s run both of the commands:
sqlmesh plan dev
sqlmesh test
And if you remember we configured a different duckdb for the test connection. That means this test will be executed using the test connection, “test.db”, as opposed to “db.db”.
If you want to learn more about tests in SQLMesh, you’ll find their documentation helpful!
Data Lineage or DAG
One feature that many data tools have is the ability to visualize the data lineage or a dag. SQLMesh also provides that either via CLI or the SQLMesh UI.
Using the CLI, you can run `sqlmesh dag file_name` to generate a simple data lineage or a dag.
sqlmesh dag dag.html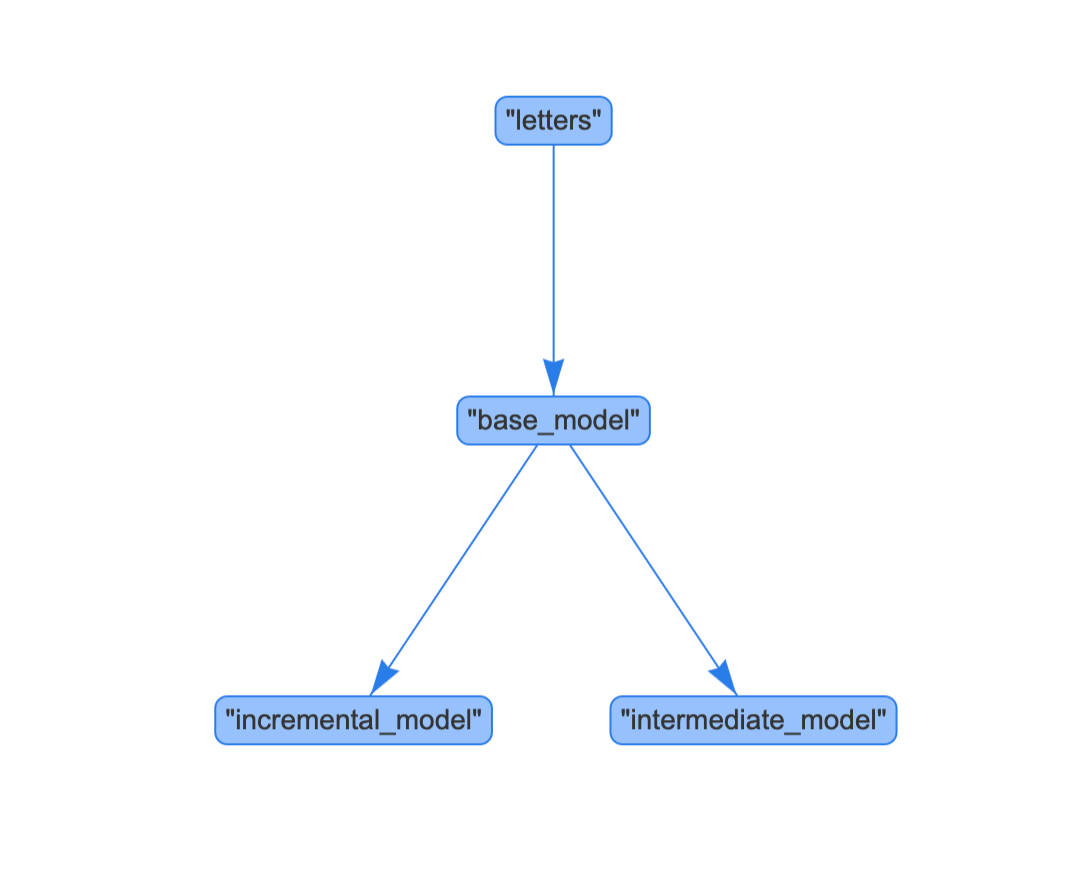
Well, this is pretty limited. You can only see the overall data flow, which may or may not be enough for you. When you want to see a better dag with more details, you’ll need to use the SQLMesh UI.
For that, you’ll have to install a dependency:
pip install 'sqlmesh[web]'And run the following to open the UI in your browser:
sqlmesh uiYou’ll be prompted to open the UI:

You’ll see a pretty UI like the following (if you don’t see the lineage, you might need to expand the area or click on a model file on the left. I clicked on “base_model.sql”):
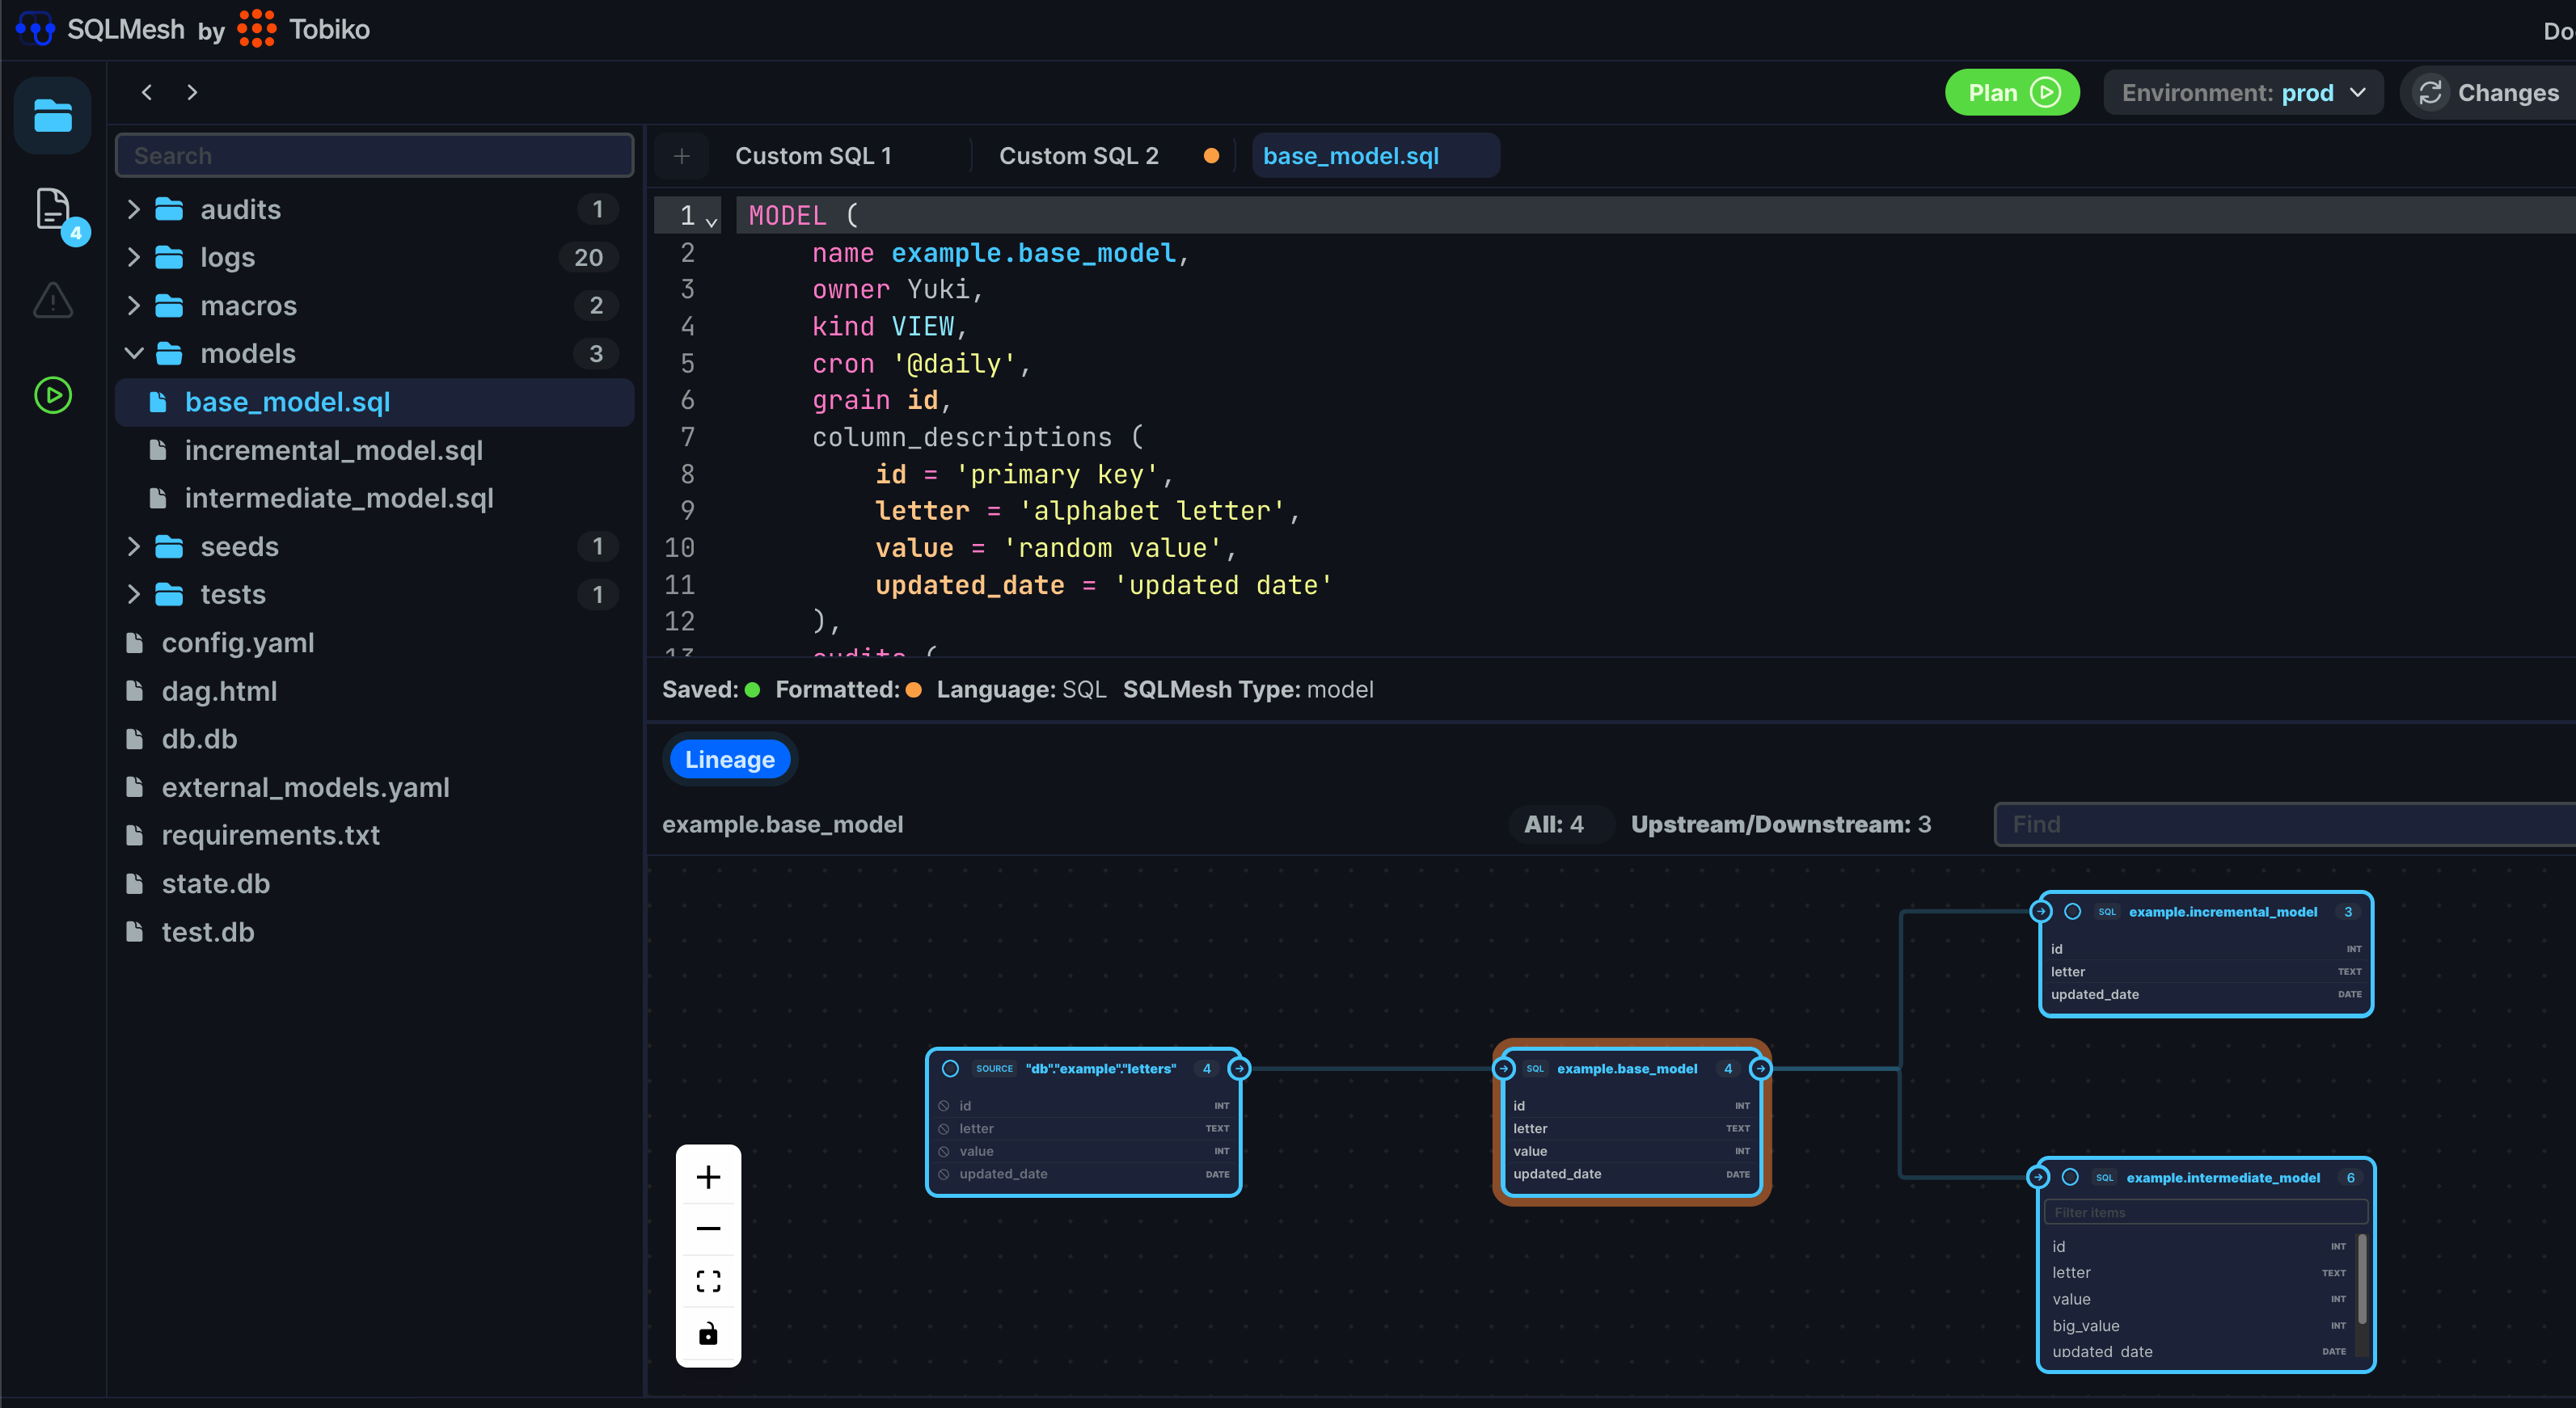
Do you want to see column-level lineage? You can just click on columns. For instance, let’s click on the `new_col`, `big_value`, and `value` columns in the `example.intermediate_model`:
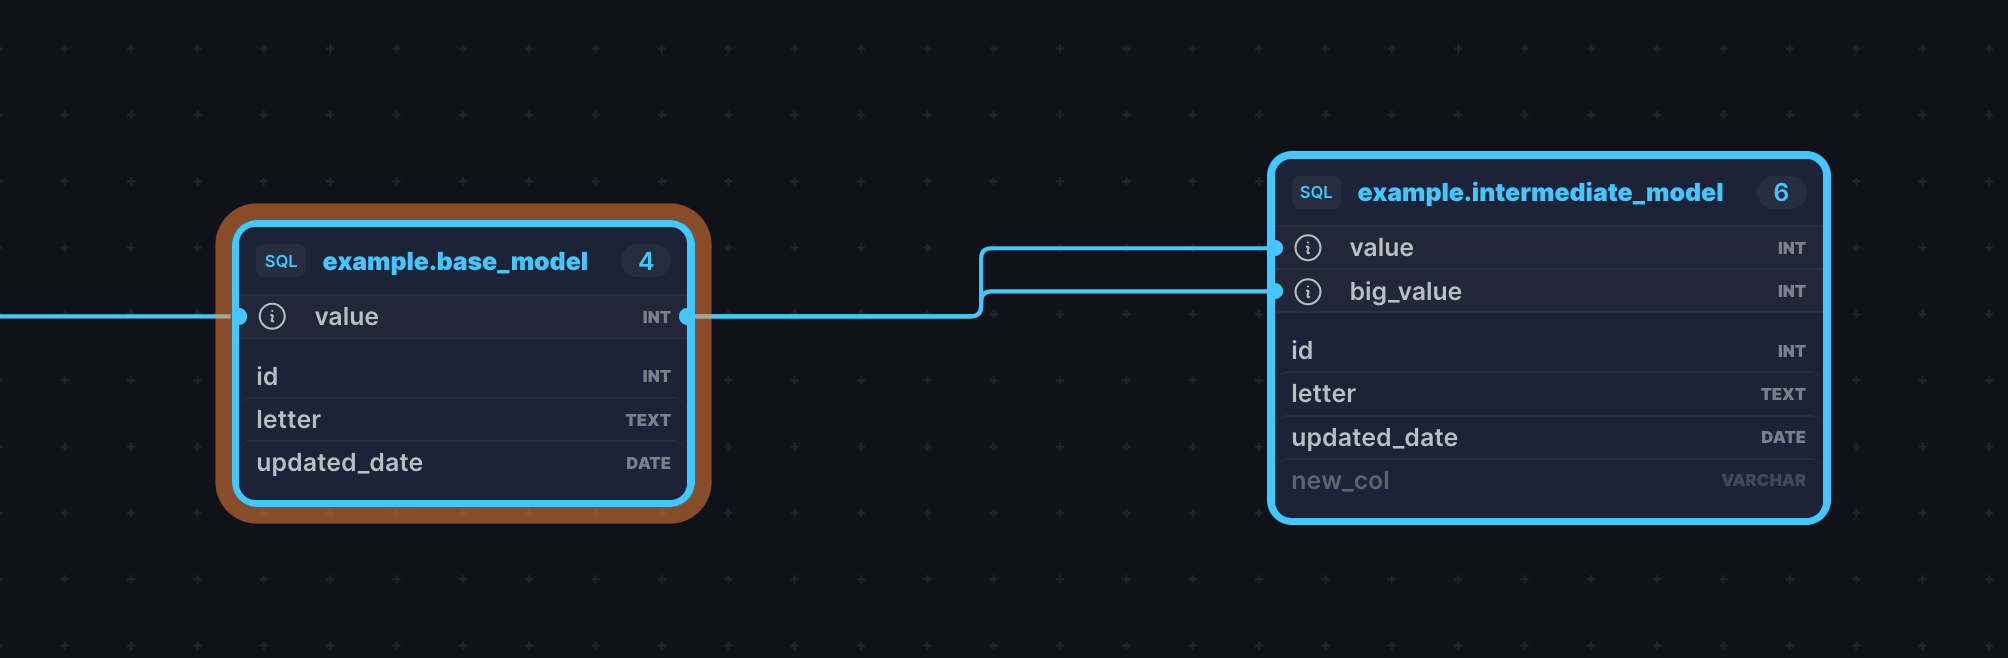
SQLMesh shows how both `value` and `big_value` are coming from `value` in the upstream table. Whereas, `new_col` got grayed out once I clicked on it.
Data lineage is just the tip of the iceberg when it comes to what the SQLMesh UI has to offer. You can do all the development tasks from this UI if you choose to do so.
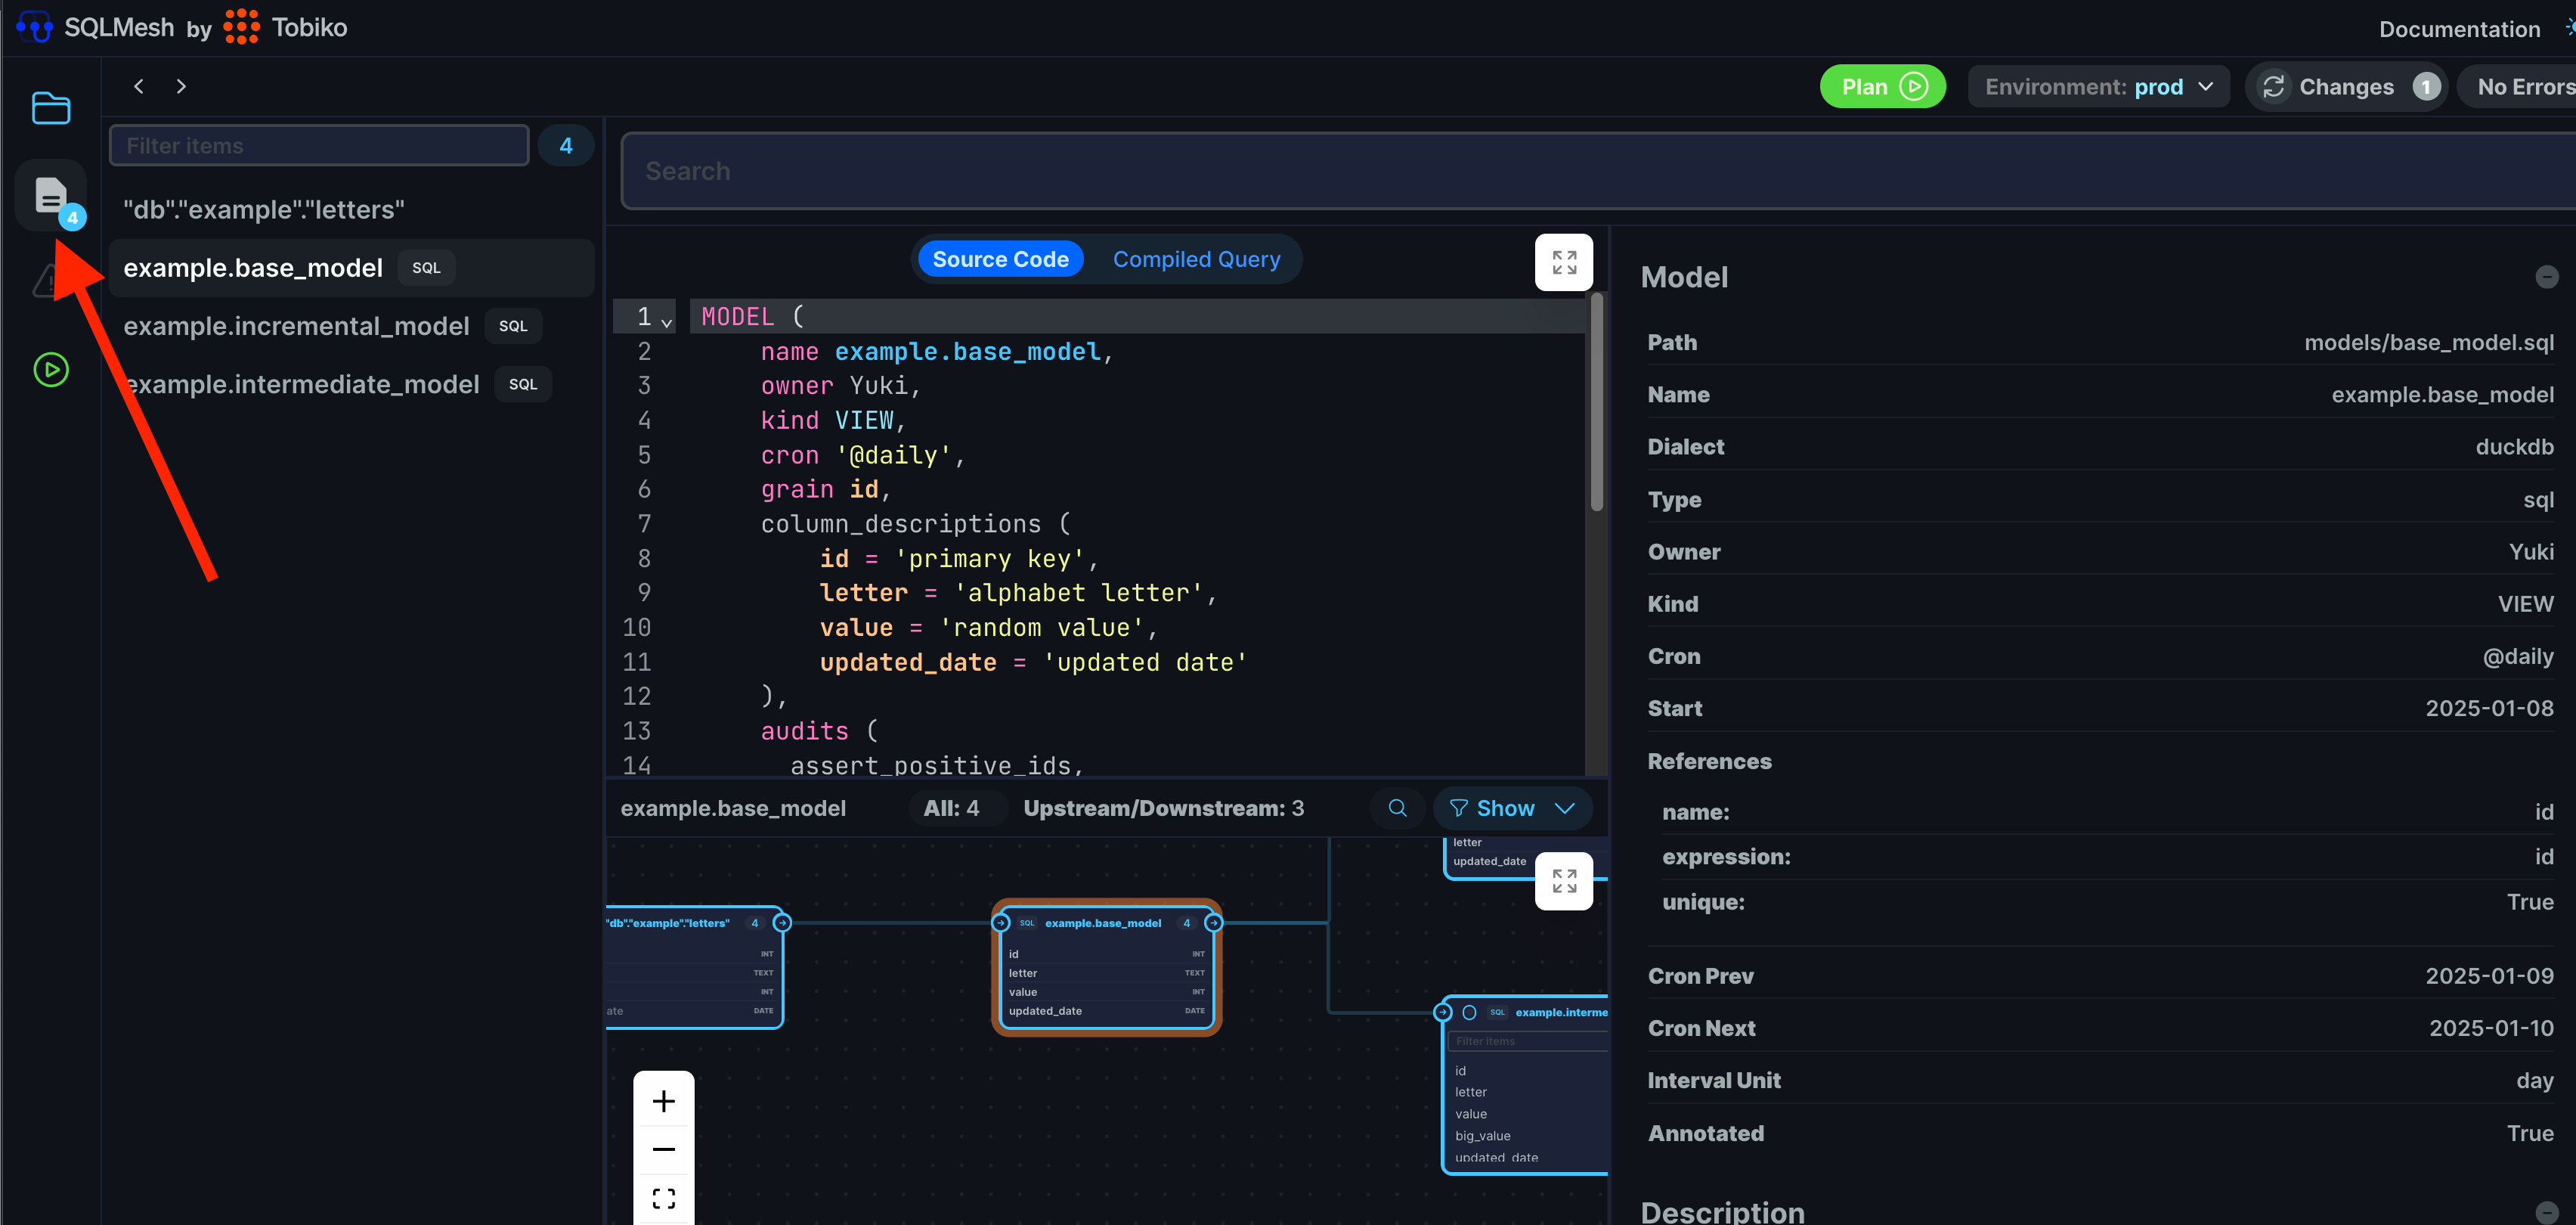
Since we’re here, let’s see how you can find the model metadata/definitions.
Click on the “data catalog“ icon on the left. It brings you to the view where you can see model metadata including model and column descriptions:
What About Python Models?
I know many of you are passionate Pythonistas. And some things are done better using Python. Although you’ll need to return either a pandas or Spark dataframe in a Python model, I’ll be using Polars for the transformation part due to its overall utility like the speed and the clean API:
“example.intermediate_py_model.py”:
import typing as t
from datetime import datetime
from sqlmesh import ExecutionContext, model
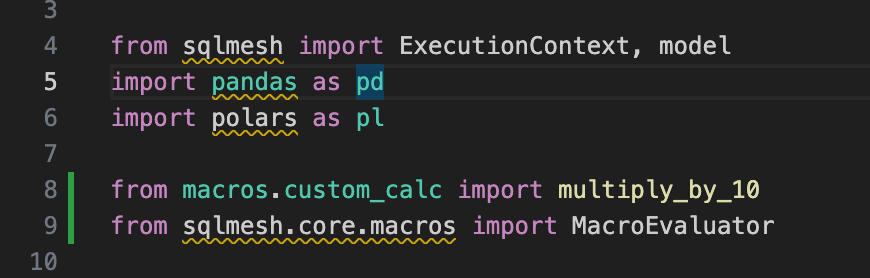
import pandas as pd
import polars as pl
@model(
name="example.intermediate_py_model",
owner="Yuki",
kind="FULL",
cron="@daily",
grain="id",
columns={
"id": "int",
"letter": "text",
"value": "int",
"big_value": "int",
"updated_date": "date",
"new_col": "text",
},
column_descriptions={
"id": "primary key",
"letter": "alphabet letter",
"value": "random value",
"big_value": "value * 10",
"updated_date": "updated date",
"new_col": "a new column",
},
)
def execute(
context: ExecutionContext,
start: datetime,
end: datetime,
execution_time: datetime,
**kwargs: t.Any,
) -> pd.DataFrame:
table = context.resolve_table("example.base_model")
df = (
pl.from_pandas(context.fetchdf(f"SELECT * FROM {table}"))
.select(
"id",
"letter",
"value",
pl.col("value").mul(10).alias("big_value"),
"updated_date",
pl.lit("new_col").alias("new_col"),
)
)
return df.to_pandas()Things to note:
The overall structure is the same including the model properties.
A Python model requires you to return either a pandas or Spark dataframe.
A Python model requires you to specify the column schema.
The use of `
ExecutionContext` is a typical approach in a Python model. It provides access to upstream tables, global variables, etc.I didn’t use a macro function in this Python model to calculate the `
big_value` column. The reason is that the way we can reference custom Python macros in a Python model is a bit cumbersome (as of this writing). If you want, here’s how you do it:import your macro function like you import a Python function in your Python model.
import in the `
MacroEvaluator` class and pass it in the macro function as its argument.
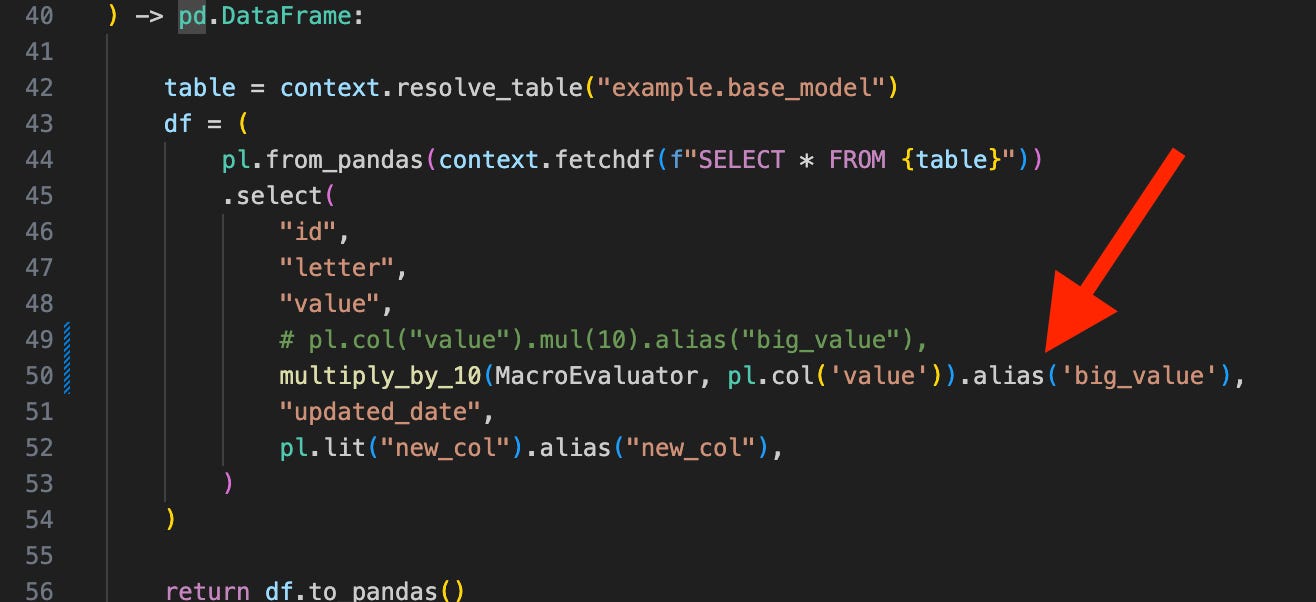
Or you define your function as a generic Python function without the `
@macro` decorator and the `evaluator` argument so you won’t need to import and pass in the `MacroEvaluator` class (Tobiko Slack thread on this).

Python models in SQLMesh are very flexible in that as long as they return a pandas or Spark dataframe, you can do pretty much anything. You can even build data ingestion jobs as Python models in SQLMesh if you want to.
A tip: with Ibis, you can have your Python model return a SQL expression, allowing your queries to be executed directly against your configured database instead of within the Python runtime. This make it possible for you to use dataframe syntax while executing your queries in your warehouse using SQL.
This approach uses the `
is_sql` model property and the `MacroEvaluator` class instead of `ExecutionContext`. However, retrieving upstream tables lacks flexibility as you must provide the full column schema of those tables. A workaround for this could be passing the column schema of your upstream tables as variables. But, this is an additional aspect you'll need to manage.Given this limitation, using `
ExecutionContext` might be the preferred approach for building your Python models at the moment.
Conclusion
Obviously, I couldn’t cover everything SQLMesh has to offer. Some things I still want to cover are:
Model types/kinds in depth
Pre/post statements
Useful CLI commands (table_dff, sqlmesh evaluate, etc)
The open-source Github Actions CI/CD Bot
etc
SQLMesh is an exciting and evolving tool. I’ll keep sharing my insights with all of you. Feel free to let me know if there’s anything specific about SQLMesh or other tools you’d like me to explore.